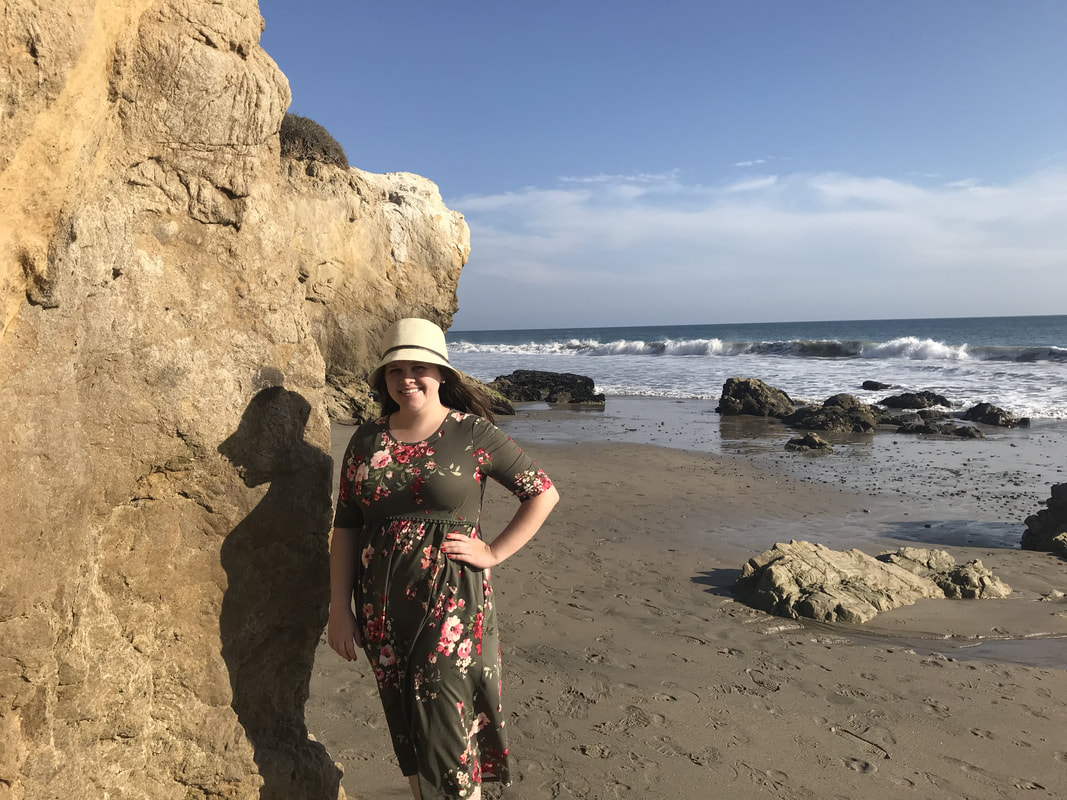
Original Photo Taken By Cathy Bell
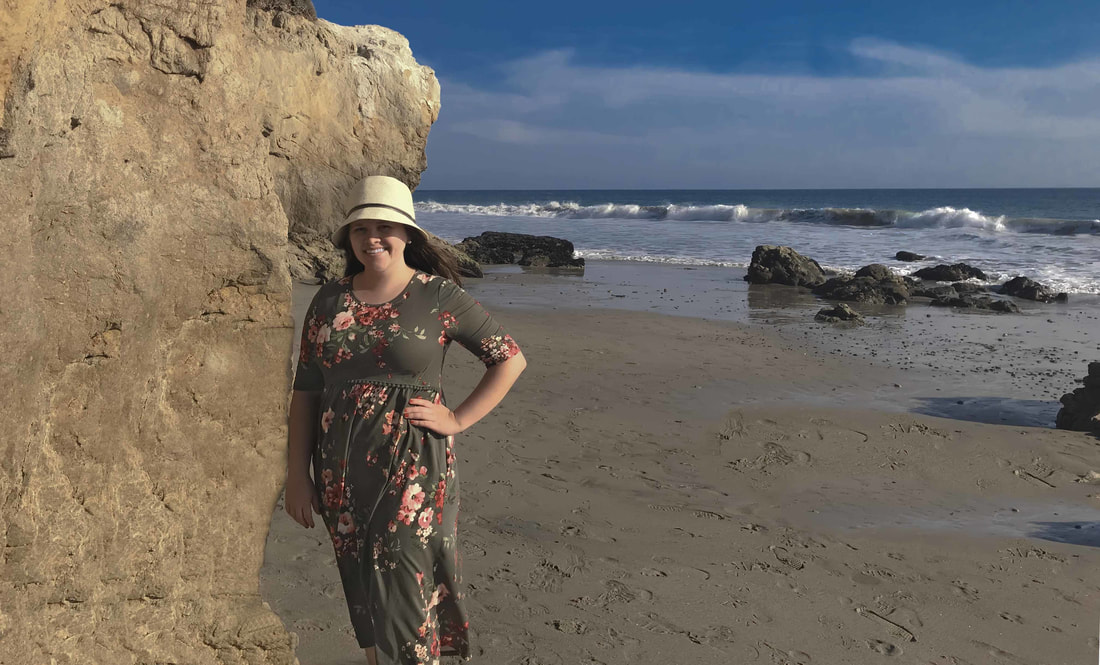
After Editing Using Photoshop
Photoshop Settings Used
I began by adjusting the whites and shadows in Camera Raw. I also adjusted the hue and lamination to bring out the blues in the sky and the ocean.
Once in Photoshop, I began by cropping the image so that the girl's face was in an intersection of the rule of thirds lines. I then used the content aware scale to stretch the image to the right, filling in the sand and the beach.
The next think I tackled was the shadow that was being cast on the rock from the girl. I used the clone stamp tool to repeat sections of the rock until the shadow was eliminated.
I used the patch tool to eliminate large yellowish rock that was to the right of the girl in the background.
I then used a mask to lighten the shadow on the girls face. I also used a mask to brighten her teeth.
The last thing I did was straighten the horizon.
Design Thoughts:
I love pictures of the beach and wanted to take this image to the next level. I wanted to brighten up the blues in the sky and the ocean. I also wanted to eliminate the shadow that was being cast on the rock because I felt like it took away from the image. There were also a few details such as rocks and clouds that I felt were taking away from the image that needed to be addressed. I also wanted to bring out the girl in the image and eliminate some of the dark shadows.
Credits:
Photo taken on an iPhone 7 by Cathy Bell.
I love pictures of the beach and wanted to take this image to the next level. I wanted to brighten up the blues in the sky and the ocean. I also wanted to eliminate the shadow that was being cast on the rock because I felt like it took away from the image. There were also a few details such as rocks and clouds that I felt were taking away from the image that needed to be addressed. I also wanted to bring out the girl in the image and eliminate some of the dark shadows.
- Contrast: I made the blue in the sky much brighter so that it would contrast the surrounding rock and sand.
- Repetition: As I eliminated the shadow on the rock, I used repetition to make the rock look natural. I repeated sections of the rock where the shadow was originally.
- Alignment: I aligned the girl (focus of the image) along the rule of thirds lines and intersections.
- Proximity: The girl is close to the front, while the ocean is further back clearly in the background.
Credits:
Photo taken on an iPhone 7 by Cathy Bell.
